Sunday, November 18, 2012

November Class - Ribbon Candy Ornaments


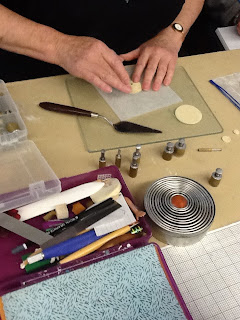
For our last class of the year we'll be making candy ribbon ornaments.  The photo above shows just a few things you can do with them.  The materials list makes plenty so we'll be able to swap and share.

You'll need:


  • Basic clay kit
  • A small package each (or thereabouts) of red, green, gold, white, pearl, and translucent, or other colours that you would like to play with.  The translucent, white, and pearl work well together, so try to bring one of each if you can.
  • About a dozen toothpicks
  • Wipes
  • A 4x4 tile and paper or card stock
Optional items include
  • Christmas embellishments if you want to add other decorations
  • Christmas cookie cutters
  • Pearlex
  • Scrap clay
  • Whatever other inspiration you need
  • Ribbon
I will bring Future Floor polish and other items.

Cheers,

Sandy


Monday, November 12, 2012

Oct notes


From: Je V <claychick64@gmail.com>
Subject: [sopcg] Oct notes
Date: October 30, 2012 7:48:20 PM EDT


Here are the instructions for BB's workshop - I had drawn sketchs too but I can't add them here, sorry.

Choose 2 colours. Condition and roll out first to #3 (#1 being thickest).
Cut 5 circles decending in size, the largest the size you want your pendant.
Use the kemper cutters to cut out centre holes from the circles again decending in size (start with 2nd largest kemper)
Put your smallest "donut" on wax paper
Stack the remaining getting larger but leave the largest off.
Flip over and press down to get all sticking together - try to make a nice slope with the clay - but don't over-press and squish.

Top piece. You may use the one you cut and decorate it by cutting and adding spokes, or use colour 2 and cut out as you did the top piece.
Flip stack over and place your top on top smoothing down the edges. Flip and ease down edges. Flip back onto a tile.
Cover with Saran wrap and re-cut with large circle cutter to make nice edge.

Remember as you are stacking to keep the centre circles consistant - here's where a pic would help - It will look like steps going down a hole in the center.

Bake for 10-15 mins and then sand the back on dry wall mesh to make it nice and flat.

Cover back with TLS (less is more!) and place on a piece of colour 2 clay rolled out to #2.

Using a chopping motion, go around the piece cutting straight down going around and around until it is same size as top (we call this the "Dan" cut). If you angle the blade in slightly all around you can pick up the piece and using your finger gently smear the 2 clay edges together for a nice finished look (think pie in pie pan).


Sixth and last group of images from Barbara's October class

Fifth group of images from Barbara's October class

Fourth group of images from Barbara's October class

Third group of images from Barbara's October class

First group of images from Barbara's October class


Second group of images from October's class


Friday, November 9, 2012

Patti's August class on lost wax beads.


Better late than never: here are some pictures and very light instructions from Patti's August class on lost wax beads.

Start with a pea sized baked bead. Dip in wax using tweezers and/or homemade dip stick. Round hot wax in palms of hands. Repeat several times until thick coat of wax. Clean tweezers frequently. Cool on ice pack.Add a layer of polymer clay using #2 thickness. Make smooth and do cut-outs. Bake in nest of polyester in cupcake paper in foil tart pan for 30 minutes. Remove from oven and immediately place on icepack and discard cupcake paper.Repeat if desired. 

Based on Desiree's method