Sunday, November 18, 2012

November Class - Ribbon Candy Ornaments


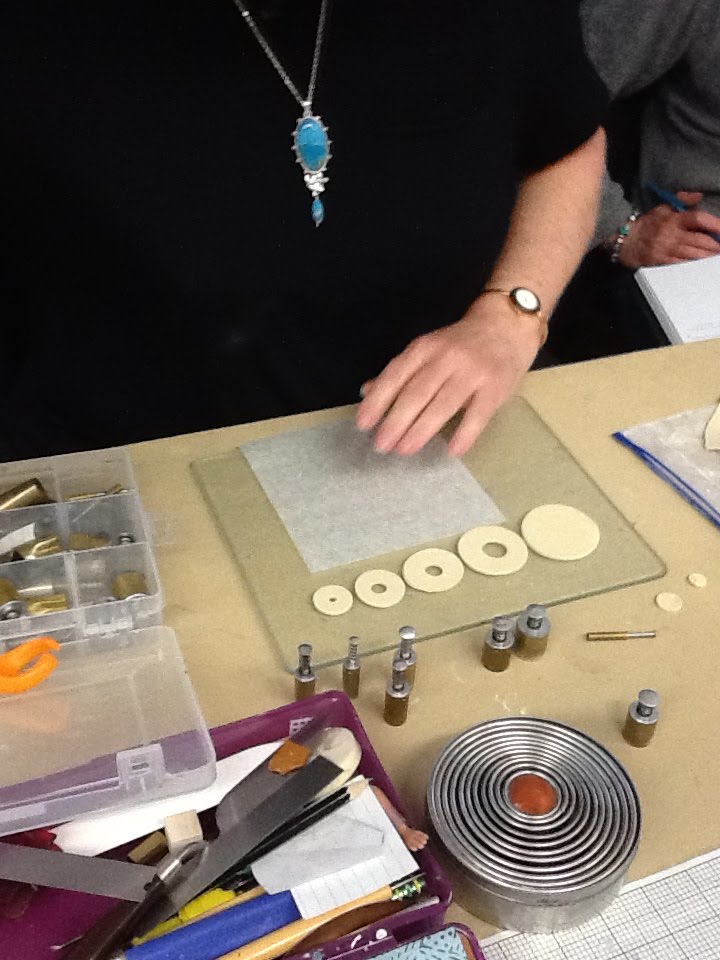
For our last class of the year we'll be making candy ribbon ornaments.  The photo above shows just a few things you can do with them.  The materials list makes plenty so we'll be able to swap and share.

You'll need:


  • Basic clay kit
  • A small package each (or thereabouts) of red, green, gold, white, pearl, and translucent, or other colours that you would like to play with.  The translucent, white, and pearl work well together, so try to bring one of each if you can.
  • About a dozen toothpicks
  • Wipes
  • A 4x4 tile and paper or card stock
Optional items include
  • Christmas embellishments if you want to add other decorations
  • Christmas cookie cutters
  • Pearlex
  • Scrap clay
  • Whatever other inspiration you need
  • Ribbon
I will bring Future Floor polish and other items.

Cheers,

Sandy


Monday, November 12, 2012

Oct notes


From: Je V <claychick64@gmail.com>
Subject: [sopcg] Oct notes
Date: October 30, 2012 7:48:20 PM EDT


Here are the instructions for BB's workshop - I had drawn sketchs too but I can't add them here, sorry.

Choose 2 colours. Condition and roll out first to #3 (#1 being thickest).
Cut 5 circles decending in size, the largest the size you want your pendant.
Use the kemper cutters to cut out centre holes from the circles again decending in size (start with 2nd largest kemper)
Put your smallest "donut" on wax paper
Stack the remaining getting larger but leave the largest off.
Flip over and press down to get all sticking together - try to make a nice slope with the clay - but don't over-press and squish.

Top piece. You may use the one you cut and decorate it by cutting and adding spokes, or use colour 2 and cut out as you did the top piece.
Flip stack over and place your top on top smoothing down the edges. Flip and ease down edges. Flip back onto a tile.
Cover with Saran wrap and re-cut with large circle cutter to make nice edge.

Remember as you are stacking to keep the centre circles consistant - here's where a pic would help - It will look like steps going down a hole in the center.

Bake for 10-15 mins and then sand the back on dry wall mesh to make it nice and flat.

Cover back with TLS (less is more!) and place on a piece of colour 2 clay rolled out to #2.

Using a chopping motion, go around the piece cutting straight down going around and around until it is same size as top (we call this the "Dan" cut). If you angle the blade in slightly all around you can pick up the piece and using your finger gently smear the 2 clay edges together for a nice finished look (think pie in pie pan).


Sixth and last group of images from Barbara's October class

Fifth group of images from Barbara's October class

Fourth group of images from Barbara's October class

Third group of images from Barbara's October class

First group of images from Barbara's October class


Second group of images from October's class


Friday, November 9, 2012

Patti's August class on lost wax beads.


Better late than never: here are some pictures and very light instructions from Patti's August class on lost wax beads.

Start with a pea sized baked bead. Dip in wax using tweezers and/or homemade dip stick. Round hot wax in palms of hands. Repeat several times until thick coat of wax. Clean tweezers frequently. Cool on ice pack.Add a layer of polymer clay using #2 thickness. Make smooth and do cut-outs. Bake in nest of polyester in cupcake paper in foil tart pan for 30 minutes. Remove from oven and immediately place on icepack and discard cupcake paper.Repeat if desired. 

Based on Desiree's method


Saturday, October 27, 2012

October Meeting

The lovely BB2Shoes will be showing us how to make this dazzeling piece tomorrow!
Take it away BB:

Right! You'll need:

The usual kit.
A really sharp blade
Some graph paper (maybe)
Surface treatment of choice like: textures, canes, painty bits, stuff like that.

All your circle cutters. All. The lot. Big and small.

To save time, it might be an idea if you choose the colours you fancy working with (there will probably be about two) and do a sheet of your preferred surface treatment.

If anybody fancies trying the spiky spokes radiating from the centre (check picture on SOPCG site, I think) that's what the graph paper's for.

Barbara C.

Wednesday, August 15, 2012

August Meeting


Bead-N-Bead (Lost Wax) project from Desiree's Desired Creations web site.

You will need to bring:
-regular clay kit
-pea to marble size, pre-baked bead
 -2 other colours of clay to go over pre-baked bead
-scissors
- a soft cold pack (the kind you can put on sore muscles after a day of claying!  I have a few to bring so do not go out and buy one)
-shape cutters (I have lots and will share with all you wonderful ladies)
-sand paper, if you want to take the time to sand your finished outer layer

That's all I can think of.

Cheers, Patti

Monday, June 18, 2012

HINGED BOOKS
Sorry - I did forget a few things :

  • index cards for drawing a template
  • painter's tape is handy to hold things in place for drilling
  • Sculpey bake and bond glue - this is probably optional but does give a stronger bond for the hinge
  • sand paper
  • pick to start the holes
You can bring a dremel for drilling, but remember a face mask too

And a clarification:
We will be making the polymer clay covers and I plan to teach the hinge method, but the cover design is open to your personal interpretation. I liked using the Cabezel and the size is good and I'll demo using it, but the clay choice and cab veneer are up to you. 

Maureen

Sunday, June 17, 2012


There are three steps to making this book:
1. The pages are paper coated with ice resin using Susan Lenart Kazmer's method:http://www.iceresin.com/articles/using-ice-resin-on-paper/
This needs to be done ahead and bring the images to class. If you use photos, they should be approx. 45mm by 65mm leaving space at the top which will go under the hinges and eyelets.

 
1a. I haven't tried this but an interesting alternative would be an image transfer on the inside of the back. We did this with Wendy a few classes ago.


2. The covers are polymer clay approx. 40mm by 70mm. I used a Cabezel, but there are many possibilities. The hinge is made using an extruder with the 3mm hole and the 1mm centre thingy.
Needed: 
  • extruder with tips
  • regular clay kit
  • a block of clay and something nice for the front
  • texture sheet if desired
  • Cabezel if desired


3. Join the front to the back with eyelets sandwiching the images between the front and back.
Tools needed:
  • bench block and hammer with flat and pein ends
  • wire cutters
  • pliers: flat nose sand round nose
  • centre punch (big enough to open 1/8 inch eyelets)
  • drill and bits including 1/8 in and 1/16 in
  • scrap of wood to drill into
  • wire straightening pliers
  • utility knife
  • scissors
  • ruler
  • safety glasses
  • hope that i've remembered everything!
  • i can share my tools
Supplies:
  • jump rings i used 3/8 in 18 gauge and 3/16 in 18 gauge
  • 1/8 in eyelets
  • 20 gauge (0.8mm diam) wire or long headpins
  • rivets and washers are optional for adding decoration to the cover.
  • i can bring enough to share - I paid about 50cents each with the shipping.
The inspiration for these books was also Susan. 
Cheers
Maureen


Saturday, June 2, 2012

Barb Fajardo is coming to town!

Hi Everyone,

I'm happy to announce that Barb Fajardo will be coming the weekend of Sept 22, 23 to Toronto to teach her Mandala Beads and More workshop.

The workshop price will be approximately $225 for the weekend excluding materials and the venue will be picked at a later date.

Skill requirements are determined beginner and above.  Anyone currently participating in the Guild has the required skill sets and people are more than welcome to come to Guild meetings to learn more.


If you'd like to reserve a spot, please contact info.sopcg@gmail.com.